Monday, June 30, 2014

4th of July Jar

This craft comes from www.fantasticfunandlearning.com

Supplies
  • Glass jar
  • 4th of July Sequins
  • Modge Podge
  • Foam brush
Step 1: Using your foam brush, modge podge the side of your jar (only do 1 side at a time)
Step 2: Sprinkle sequins to the side of your jar (press down with your fingers to help them stick)
Step 3: Repeat step 1 & 2 until your jar is covered with sequins.

*If you want more sequins on the side of your jar, do a couple layers! As soon as the bottom layer is dry, modge podge the side again and repeat the process*

Popsicle Stick Flag

This craft comes from gingersnapcrafts.com

Supplies:
  • 7 Jumbo Popsicle sticks
  • Red acrylic paint
  • White Acrylic Paint
  • Blue Acrylic paint
  • White card stock paper
  • Scissors
  • Paint brush
  • White glue
  • Hot glue gun
  • Star sequins


Step 1: Using your red acrylic paint, paint 3 Popsicle sticks red
Step 2: Paint 2 Popsicle sticks white
Step 3: Cut 2 Popsicle sticks in half
Step 4: Take 3 half's of the Popsicle sticks you just cut, and paint them blue (discard additional half)
Step 5: Cut your card stock into a rectangle (cut 5 inches wide, and 12 cm high)
Step 6: One at a time, glue your Popsicle sticks horizontally onto the paper (RWRWR)
Step 7: Using your hot glue gun, Glue 3 blue Popsicle halfs onto the top left side of your flag
Step 8: Glue stars onto blue Popsicle sticks.

American Flag Pin

This image comes from www.flickr.com
Supplies
 
  • 11 Safety pins
  • Small blue glass beads
  • Small red glass beads
  • Small white glass beads


Step 1: Open one of your safety pins. Slide glass beads onto the pin.
The pattern is as follows

B= blue R=red W=white
BBBB R W R W

Step 2: Once you have slid all the beads onto the pin, close the safety pin. Set aside.
Step 3: Repeat pattern on 4 additional safety pins (Total of 5 blue beaded safety pin)
Step 4: Slide glass beads on last 5 remaining pins
The pattern is as follows

R W R W R W R W

Step 5: Once you have beaded all the pins, Place all of them in order (5 blue in front, red and white at the end)
Step 6: Open a new safety pin. One at a time, slide the bottom part of your beaded pins onto the new safety pin you just opened. Do this until beads form an American flag
Step 7: .Once all pins are in place, close top pin.

Friday, June 20, 2014

CD Fish

Recycle, and make this fun craft at the same time!  Many of us have old CD's lying around ( I know I do!) , Instead of throwing them away, make this cute craft! This is the perfect craft to do with your kids, and free up some room!

This craft comes from www.parents.com
Supplies
  • 2 CD
  • Card stock paper (whatever color you want)
  • String
  • Elmer's Glue (or hot glue gun)
  • Two wiggle eyes
  • Acrylic jewels
    Scissors
Step 1: Take piece of string (this will be used to hang the fish) and glue to the front of one of your CD's (non shiny side)
Step 2: After glue attaching the string is dry, Take both CD's and glue them together (make sure the shiny part is on the outside)
Step 3: Glue wiggle eyes to both CD's. Line them up on both sides
Step 4: Glue acrylic jewels to your CD fish
Step 5: Cut out tail, lip, and fin shapes out of your card stock paper
Step 6: glue lips, fins, and tail to the CD

Wednesday, June 18, 2014

Paperplate chick

This craft comes from simpleasthatblog.com

Supplies

  • Yellow Paper Plate
  • orange paper
  • Wiggle eyes
  • Yellow feathers
  • Elmer's Glue
  • Scissors

Step 1: Cut out a diamond shape out of orange paper, and fold in half (this will form the beak)
Step 2: Glue Wiggle eyes to paper plate
Step 3: Glue beak to plate
Step 4: Cut out two long pieces of orange paper (make sure they are the same size)
Step 5: Fold orange strips into a accordion style (this will make the legs 

Step 6: Cut out 2 chick feet
Step 7: Glue legs to the bottom of the paper plate
Step 8: Glue chick feet to legs
Step 9: Glue feathers to the side of the paper plate (this will make the wings)

Pom-pom bunnies

Image comes from www.pinterest.com

Supplies

  • Large Pom-pom
  • Small pink Pom-pom
  • Fun Foam
  • Scissors
  • Hot Glue Gun (or Elmer's Glue)


Step 1: Cut Bunny ears, feet, teeth and whiskers out of fun foam
Step 2: Using your hot glue gun, glue wiggle eyes to the Large Pom-pom
Step 3: Glue Small Pom-pom underneath eyes (this will make the nose)
Step 4: Glue whiskers next to the nose
Step 5: Glue teeth beneath nose
Step 6: Glue feet to the bottom of the Large Pom-pom
Step 7: Glue ears to the top of the pom-pom


Paper Plate Ladybug

This craft comes from www.housingaforest.com

Supplies:

  • Paper Plate
  • Red Acrylic Paint
  • Black Acrylic Paint
  • Black Card Stock Paper
  • Paintbrush
  • Wiggle Eyes
  • Black yarn
  • Black Pony Beads
  • Scissors
  • Glue
  • Tape

Step 1: Cut the paper plate in half
Step 2: Using your red acrylic paint, paint the plate red
Step 3:
Cut out a middle sized circle out of your black card stock (this will make the head)
Step 4: Cut out six pieces of yarn, making it the same length. (this will make the legs)

 Step 5: When the paper plate is dry, paint black spots (using black acrylic paint)
Step 6: Tie pony beads to the end of the legs
::Step 7: Glue head to body
Step 8: Glue wiggle eyes to head

Tuesday, June 17, 2014

Cardboard Snake

This craft comes from www.parents.com

 Supplies
  • Paper towel or toilet paper tube
  • Wiggle Eyes
  • Red paper
  • 2 different colors of Acrylic Paint
  • Paint brush
  • Scissors


Step 1: Using your base coat of acrylic paint,paint the inside and outside of the toilet paper tube
Step 2: Using your second color of acrylic paint, decorate the snake with dots of paint
Step 3: Once the paint is dry, cut the tube into a long strip Step 4: Cut out a forked tongue shape from the red paper
Step 5: Glue tongue and wiggle eyes to the snake 

Fridge Magnets

This craft comes from craftyenough.wordpress.com
 
Supplies
  • Scissors
  • Glass decorative stone
  • Magazine
  • Modge Podge
  • Paintbrush
  • Magnets
  • Hot Glue gun


Step 1: Find images from the magazine that you want to make into a magnet, and cut to sizeStep 2: Using your paintbrush, coat magazine image with Modge Podge Step 3: Stick image to the back of your glass decorative stone Step 4: Once the Modge Podge is dry, hot glue a magnet to the back of your stone

Gumball machine

This image comes from www.pinterest.com

Supplies
  • Ceramic flower pot
  • Ceramic pot base 
  • Acrylic paint 
  • Round glass bowl
  • Round wood beads
  • Wood doll pin stand 
  • Paint brush 
  • Hot glue gun
  • Ribbon
 
 
Step 1: Using your red acrylic paint, paint the flowerpot, flowerpot base, wood bead, and wood doll pin stand red
Step 2: Once the paint is dry, Glue wood bead to the bottom of the flower pot base (this makes the lid)
Step 3: Hot glue doll pin stand to the middle of your pot
Step 4: Using your hot glue gun, Glue glass bowl to the bottom of your flower pot
Step 5: Tie a ribbon around the base of the glass bowl
Step 6: Put candy into glass bowl
Step 7: Place base of the flowerpot on top of the glass bowl (this will be the lid)
Enjoy!

Monday, June 16, 2014

Lady Bug Rocks

This cute craft comes from http://www.parenting.com/
Supply List
*all items from supply list can be found at your local craft store*


Step 1: Paint the body of your Ladybug. Paint the full rock your desired color, let dry. *this may require more then 1 coat of paint*
Step 2: Paint the head of the ladybug using your black paint.
Step 3: Paint 'wing line down the middle of the ladybug with small brush.
Step 4: Using a small brush, paint ladybug spots
Step 5: Spray rocks with acrylic sealer. *do this outside, the fumes are very strong*
Step six: using craft glue or hot glue gun, glue wiggle eyes onto bug. 


Don't let your creativity stop here! Anything imagined can be created! Get more ideas on rock pets here

Saturday, June 14, 2014

Water Party Sponge ball

Having a Summer water party? This craft makes a perfect addition to any water party!

This craft comes from onecharmingparty.com

Supplies:
  • 3 sponges (best to make each a different color)
  • Dental floss
  • Scissors 


Step 1: Cut each of your sponges into fourths (long ways) 
Step 2: Place all pieces (in random order) into your hand
Step 3: squeeze pieces and twist
Step 4: Tie dental floss tightly around the middle, tie a into double knot. (I would suggest you have a crafting buddy do this)
Step 5: Tie any excess floss
Step 6: fluff sponge ball 

Thursday, June 12, 2014

Father's day candy jar

This Craft comesfrom http://sisterssuitcaseblog.com

Supplies 
Glass Jar
Printable Tag (on sistersuitcaseblog)
Bag of Hershey HUGS
Bag of Hershey Kisses 
Ribbon to go around the lid of the jar
Glue 


Step 1: Fill jar with a mixture of Hershey Kisses and Hershey Hugs
Step 2: Glue or Tie Ribbon to lid of the jar
Step 3: Print up Tag
Step 4: Cut out Tag
Step 5: Using gluedots, attach printable tag to glass jar 

Wednesday, June 11, 2014

Creativity is not the finding of a thing, but the making something out of it after it is found.
Father's Day is just around the corner! Do you have a gift for your Dad? Check out this craft!

This craft comes from www.parenting.com/

Supplies 

  • Wooden handled hammer
  • Acrylic paint (color varies depending on what you want) 
  • Paintbrush 
  • Clear wood finish
 Step 1: Using your acrylic paint, Paint stripes around the handle of the hammer (you may need to do a couple of layers
Step 2: After you finish painting, leave your hammer to dry completely
Step 3: Once the hammer is completely dry, apply clear wood finish to handle (make sure to follow instructions on wood finish bottle)

Tuesday, June 10, 2014


Lego Soap

Use this incredibly simple technique to encourage your kids to wash their hands! 

This craft comes from rockinboys.com

Supplies 
One clear Bottle of liquid soap or hand sanitizer
Legos 

Step 1: Remove label from soap
Step 2: insert legos into soap bottle
Step 3: Stir around legos usin soap wand 
Step 4: Twist lid back on to soap bottle 

*If you have a little boy, make sure to check out rockinboys.com There are some excellent crafts for boys*

Monday, June 9, 2014

Candlestick frame

This craft come from http://www.marcicoombs.com/2013/04/candlestick-frames.html
Supplies:
Picture frame 
Candle stick 
Hot glue gun 
Spray paint
Newspaper
*optional* Embellishments (flowers, acrylic jewels, ribbon ect) 


Step 1: Lay your newspaper down, and spray paint your frame, and your candlestick
Step 2: Once frame and candlestick are completely dry, hot glue frame onto candlestick (make sure the frame is near the front of the candlestick
Step 3: Add any desired embellishments

Sunday, June 8, 2014

The greatest adventure is to live your dreams and make your life your own, unique masterpiece of art.-don Miguel Ruiz

Saturday, June 7, 2014

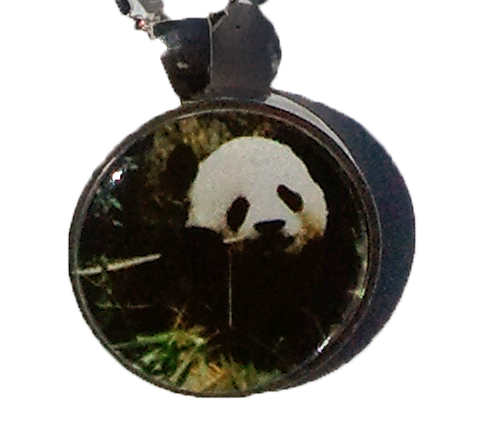
How to size an image to fit inside a bottle cap necklace

One of the most popular crafts as of late has been bottle cap necklaces. We see them, we love them, and most likely, you have probably made them. But have you ever wanted to put your own pictures in your necklace, like your kids or your family? Well after lots of research and experimenting, I have finally figured out that magic formula to make your own bottle cap necklace pictures. 
To do this tutorial, you will need Microsoft                        Powerpoint ( I have the 2010 version)                                                                                

 Step 1: Insert your photo into Powerpoint


Step 2: Double click your photo to open the Picture Tools- Format tab. Click the Crop Tool down arrow.

 Step 3: Once you have clicked the down arrow, go to Aspect Ratio. Underneath the square option, click 1:1

Step 4: Drag the crop square until it is in the desired place. Once you are satisfied the the placement, push the crop button. 


Step 5: Once your photo is cropped to a square shape, click the down arrow on the crop button. Go to the Crop to Shape option, and choose the Oval shape underneath the Basic Shapes tab.


Your picture should now be in the shape of a circle 


Step 6: Go the Height and Width in the size box. Change the measurement to 1 inch x 1 inch 

Now your photo is ready to print! This will fit in crafting bottle caps, and 1 inch pendants. 

If you want a tutorial on how to make bottle cap necklaces, visit my Pressed leaf necklace Youtube video. (if you don't want to learn how to make a pressed leaf necklace, skip forward to 6:45)

Jellyfish in a bottle

This craft is brilliant! Make your own jellyfish in a bottle!


Clothespin Ants


Make this cute Summer critter with your kids!


This craft comes from www.parents.com/
    Supplies:
    • Clothes Pin 
    • Black acrylic paint 
    • Paintbrush 
    • Black Pipe Cleaner 
    • 3 Large Black buttons 
    • 2 Wiggle eyes
    • Hot Glue gun 

    Step 1: Using the black acrylic paint, paint your clothespin black 
    Step 2: Take your black pipe cleaner, and string through two holes in one of your buttons
    Step 3: Cut pipe cleaner at desired length, and twist pipe cleaner  (this will make the ants antenna) 
    Step 4: Glue wiggle eyes on button, in front of antenna.
    Step 5: Cut three 3" pieces of black pipe cleaner
    Step 6: Thread the 3" pieces of pipe cleaners through the clothespin spring hole (this will make the ants legs) 
    Step 7: Bend and shape the pipe cleaner to form the ants legs 
    Step 8: Using your hot glue gun, glue the three black buttons to the top of the clothespin (make sure to place the one with the antennas in the front!)

    Friday, June 6, 2014

    Rose Centerpiece

    Need an easy craft to do while your kids are at their 

    friends house? Make a rose centerpiece!


    This craft is from smartschoolhouse.comThis site has some really cute crafts, so make sure to check it out! Supplies


    • bouquet of faux roses
    • Styrofoam cylinder (3/4" tall)
    • 1.5″ Ribbon (if you want your ribbon to look like the one in the picture, get burlap ribbon. 
    • Hot Glue gun


    Step 1: Take roses off of their stems
    Step 2: Arrange roses in Styrofoam cylinder
    Step 3: Using your hot glue gun, glue the ribbon around foam cylinder 

    Enthusiasm is excitement with inspiration, motivation, and a pinch of creativity.

    Sun Mobile

    Do you need a cute summer craft for your kids to do? This Sun Mobile is cute and easy to create! This is also a great craft to do with your toddler.

    This Craft comes from onecharmingparty.com


    • Supplies
    • Paper Plate
    • Yellow construction paper 
    • Elmers Glue 
    • Yellow Tissue Paper 
    • Orange Tissue Paper
    • Yellow Yarn 

    Step 1: Punch a hole in the top of your plate
    Step 2: Run your yellow yarn through the hole to make a loop at the top, tie yarn together 
    Step 3: Cut yellow and orange tissue paper into squares 
    Step 4: Using your Elmer's Glue, paste orange tissue paper to the middle of your plate
    Step 5: Paste yellow tissue paper around the orange, until the rest of the plate is full of yellow tissue paper 
    Step 6: Cut long 1" strips of yellow construction paper 
    Step 7: Glue ends of the construction paper together to form a loop 
    Step 8: Repeat step 7 until you have eight loops 
    Step 9: Glue loops around the sides of the paper plate 

    *You can also add acrylic jewels to your paper plate, and hang in the window to reflect the sun! Use a hot glue gun to attach the jewels*

    Thursday, June 5, 2014


    Father's Day Reese's Pieces Jar

    This is an awesome craft for Father's Day! Remember, The way to a man's heart is through his stomach!

    Father's Day Reese's Pieces Jar


    This craft comes from http://creativelychristy.blogspot.com

    Supplies 

    • Glass Jar
    • Reese's Pieces
    • Colored Cardstock 
    • White Cardstock 
    • patterned scrapbooking paper (for the tie)

    • piece of thin Ribbon (to go around the lid)
    • Glue Dots
    • craft circle punches-: 1&3/8" and 1&3/4"
    •  Tie and label PDF (creativelychristy pdf)


    Step 1: Fill Glass Jar with Reese's Pieces 
    Step 2: Print out Tie and Label PDF
    Step 3: Cut out white collar, fold on dotted lines
    Step 4: Attach the collar to the jar using glue dots 
    Step 5: Using the tie pattern, trace the shape onto your patterned paper
    Step 6: Cut out the tie
    Step 7: Attach the tie underneath the white collar, using glue dots
    Step 8: Using your 1&3/4" Circle Punch, Punch out a circle of colored cardstock 
    Step 9: Using your 1&3/8" circle punch, punch out "love you to pieces" label
    Step 10: Using your glue dots, attach label to the lid
    Step 11: Wrap ribbon around the lid of the jar.
    There is a fountain of youth: it is your mind, your talents, the creativity you bring to your life and the lives of people you love. When you learn to tap this source, you will truly have defeated age.


    ~Sophia Loren